Penelopean robotics part 2 - building a robot by weaving
Posted Oct. 20, 2018 by Dave GriffithsPenelopean robotics are about rebuilding technology in the woven cosmos. You can read more about the theory in part 1, but roughly our aims are to:
- Embody Penelopean technological practice - they should be easily undone (taken apart) so they can be understandable, self documenting and repairable.
- They are not automated looms, but must eventually be capable of weaving in some form, maybe by interacting with ancient Greek weaving technology.
- Capable of embodying elements of ancient Greek poetry and dance, perhaps via livecoding.
- Be constructed in the spirit of Simone Giertz rather than Boston dynamics.
Some potential further directions we have discussed are swarm robotics and the use of May poles as a stepping stone between dancing, braiding and weaving.
This is a story of one Penelopean robot.
The original concept of the weaving robot as described in the project was an 'arachnoid mechanism'. We wanted to stick with this general direction and begin by building a six legged insectoid. After a bit of acting to work out the movements required, and looking on youtube for similar robots, it seemed that it was possible to do this with 3 servos, two for the front and back which rotate horizontally and one in the middle which rotates vertically.
Weaving crops up in plenty of medical, space and industrial situations - the strength and lightness of woven structures has lots of advantages over other techniques used in engineering, and in the spirit of the project it seems appropriate to try tablet weaving as a way to construct the main framework for the robot. For more info on how to do tablet weaving yourself, see this previous post and this one.
Double weave can be used for this as it allows you to weave tubes and pockets without any cutting or stitching, so they have very strong joins. Here is a sketch of the initial design:
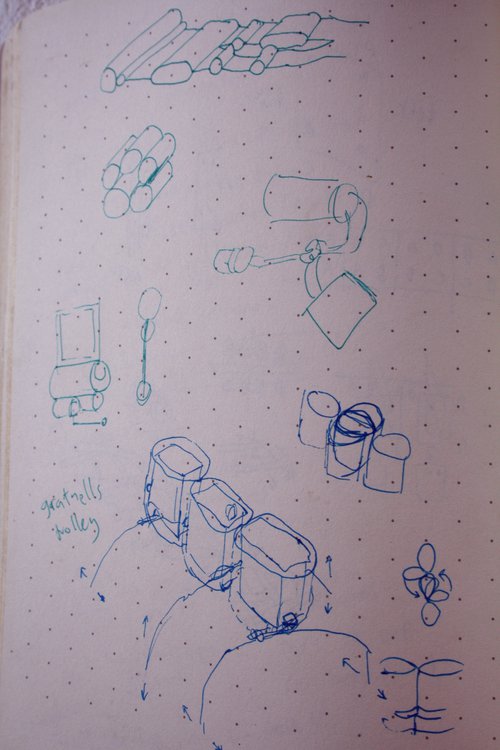
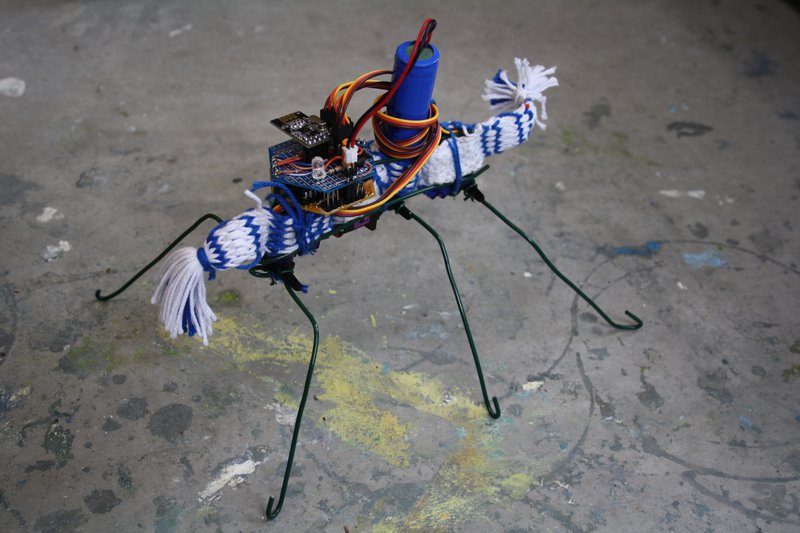
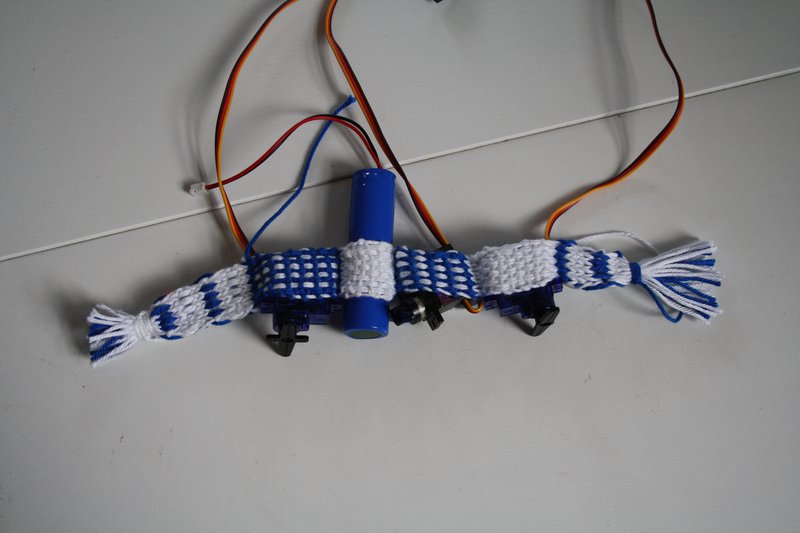
Three joined tubes can hold the micro servos in place, and I later added another smaller one in between for a cylindrical lithium ion battery from Adafruit that was the perfect shape for this.
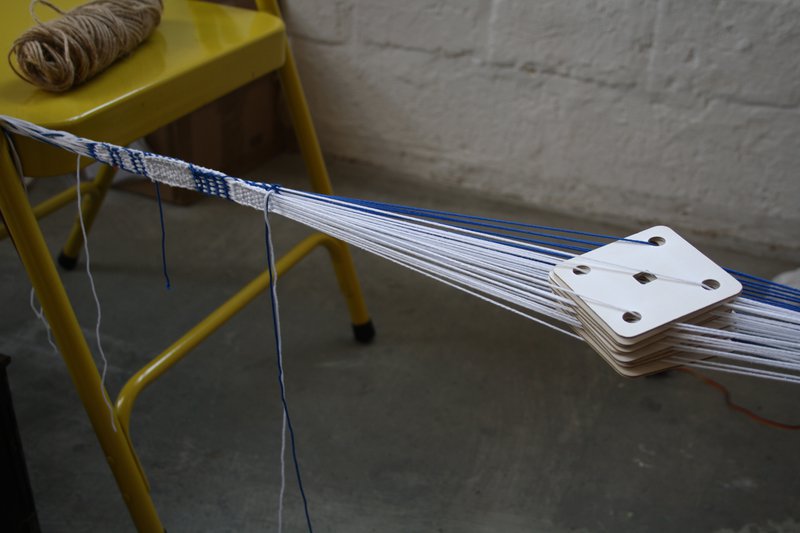
The process of weaving was a case of starting with a normal section, followed by beginning a double weave split via two weft threads, and checking it every couple of wefts to fit the first servo. When it's big enough to tightly fit you close the first tube and immediately start a second, for the battery - then the middle servo (which fits at right angles to the others so is slightly smaller) and finally the last servo, with a normal section of tablet weave to close it up. This didn't take very long, but to make more I could easily count wefts based on the first one and do a lot more quickly - for example, manufacturing swarms of these robots.
As a comparison, this process would be much more difficult and slow via 3D printing - as you can't generally change anything on the fly, and the design needs to be completed before printing, and the softness turns out to be important.
Although the weave is strong in itself, it still needs a skeleton for the robot to stand up. I used 2mm wire for both this job as well as the legs. One piece of wire is used for the top (which loops around
the battery) and another bent double for the lower side. This scaffolding means that the middle legs will be able to push against something to raise the other legs to walk. Then all you need to do is tie loops of thread around each servo to hold it in place along with the scaffold. This may be unnecessary with a bit more development.
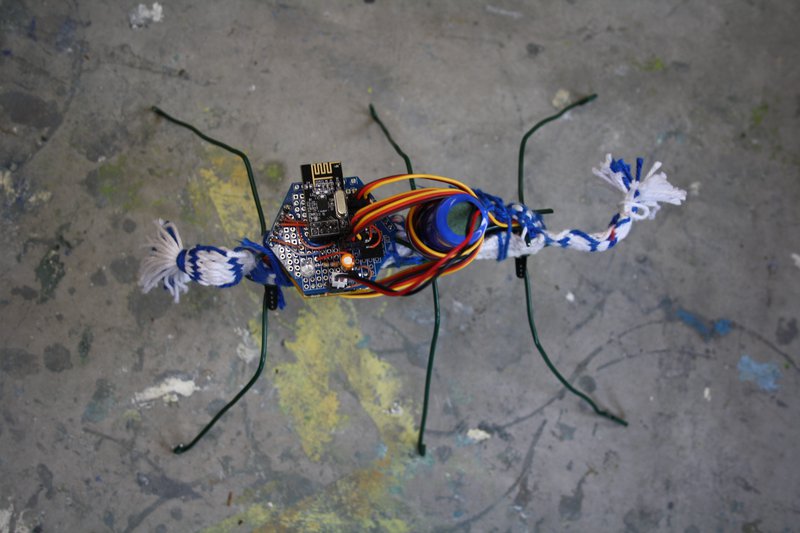
The PCB for the microcontroller and radio (more on that in a later post) can also be tucked under the top wire so it's locked out of the way of the legs on top.
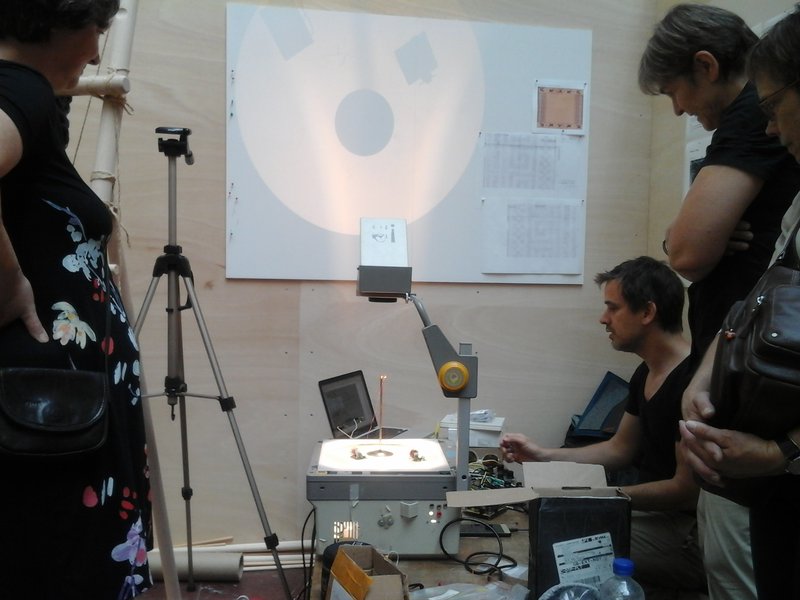
Christian Faubel showing us the unique nature of analogue computation and what happens when you apply this to robotics at the Penelope robotics workshop in Munich.
At the time of of the Penelope robotics workshop I could get the robot to shuffle a bit in generally the right direction but it wasn't very efficient or convincing. It took a little servo sequencer programmed by the pattern matrix (in a similar manner to how it sequences music) to experiment with it and work it out properly. This takes a short list of symbols representing angles (from -90 to +90 degrees) which loop.
This is the working code for walking on the pattern matrix - more descriptive tokens will be made in future! These patterns are sent over radio to the robot whenever they change.
The general idea is that if you have 6 legs you can keep 3 feet on the ground while moving the others, which is much more stable than if you need to balance. The front and back servos job are to drive the robot forward and have the same movement as each other at the same time. The role of the middle legs are to lift the side of the robot up in alternate phase so only the ones pushing 'back' are touching the ground.
This meant we could use the pattern matrix to do things like switch direction by inverting the middle row above, which controls the central servo. This lifts the robot's sides in the inverse phase, which means its feet (following the same pattern) move it in the other direction.
You can see a selection of different patterns of movement on this video:
The best aspect of the woven structure was how strong it was - it could throw itself around all day without problems and the flexibility helps too with the movements required. I could also stuff the robot into the bottom of a bag and it would be fine the next day.
There will be more info here on how to build them - for now the code is all here, the electronics is based on this prototype board - watch this space for more of the details on the radio enabled tangible robot livecoding.
Created: 15 Jul 2021 / Updated: 15 Jul 2021


